Create a new budget
When the program is started after installation it starts with a new budget, ready for you to start entering your information. The other way to create a new budget is to press the "New" button on the top menu bar in the application.
Add accounts
Once a new budget is created it's time to add your accounts. When a new budget is created the application starts on the accounts page since accounts are the first thing to add for a new budget. Create the account you most often pay bills from first. For most people this would be your checking account. You might also want to create a savings account, 401K or IRA account. If you have a credit card, car loan or mortgage you need to create accounts for them too. See the "Add accounts" guide for examples.
Add events
After creating your accounts the next thing to do is add some events. Typical events would be a paycheck, rent or mortgage payment, credit card payment or various expenses. See the "Add events" guide for examples.
Save your budget
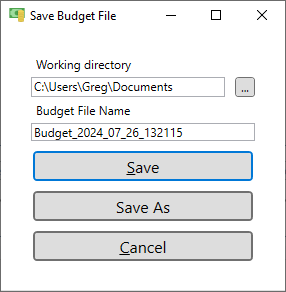
Now let's save the budget file by clicking the "Save" button on the main menu. This will show the "Save Budget File" window. The working directory is shown and can be changed here as well. Enter name for your budget file. Check "Append a timestamp" if you want to make the date and time part of the file name. If this is done then every budget file is saved into a different File because the timestamp will be different each time you save the file. This can be helpful if you want to be able to look back at older budget files. Each time you save the budget file you can decide if you want a timestamp or not. Simply uncheck the checkbox to remove the timestamp.

View the schedule page
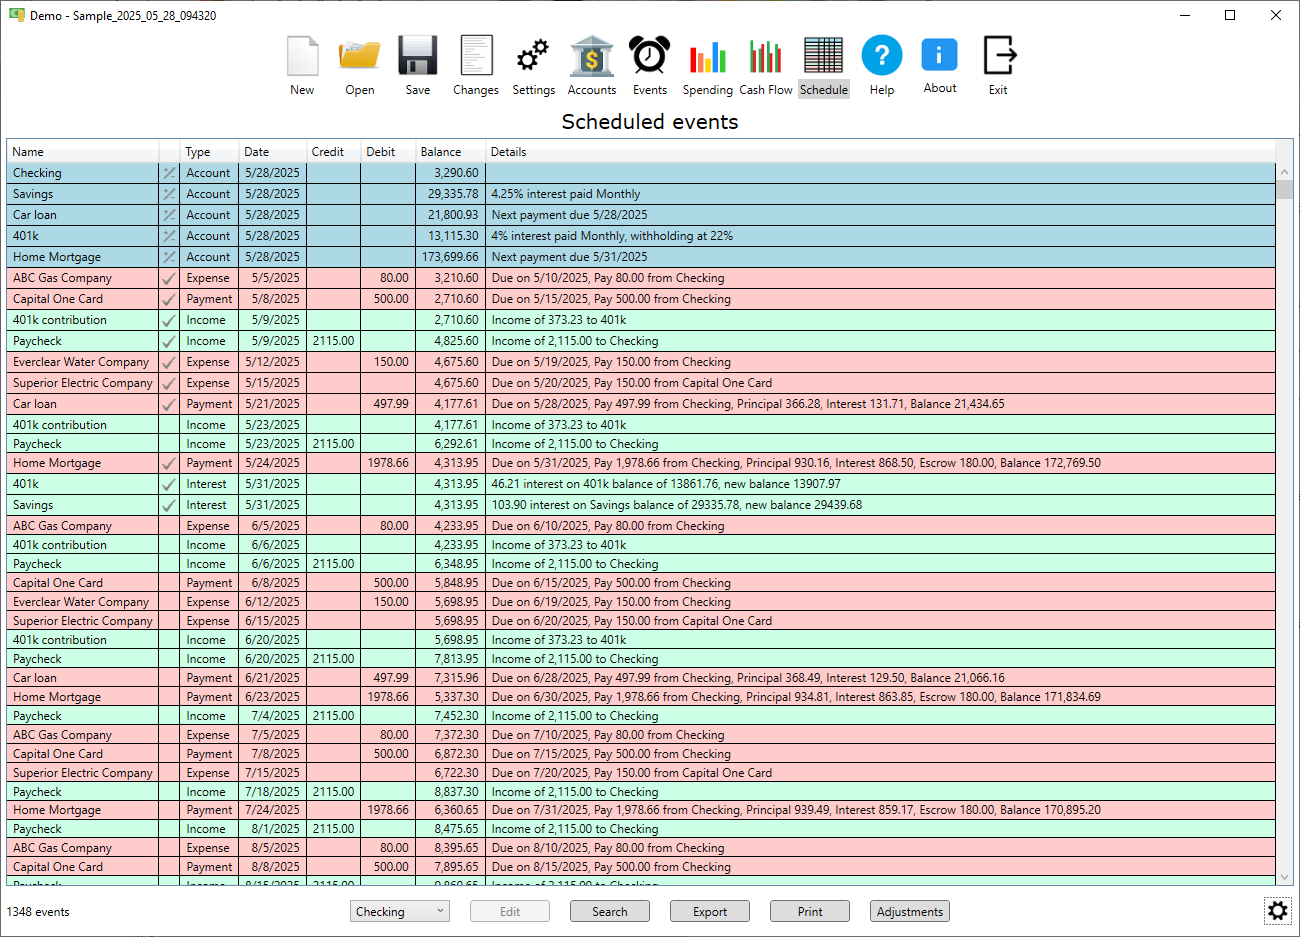
Now that you have some accounts and events let's look at the schedule page. Just click on the "Schedule" icon in the main menu at the top to show the schedule page. When loading a budget file this is the default page you will see. The top rows are always the balances of accounts that have "Show balance on schedule" checked in the account settings. This is where you can see upcoming event occurrences like what bills are coming due and when you need to pay them or when you get your next paycheck. These event occurrences will remain in the list until they are completed. To complete an event (i.e. paying a bill, receiving money or any other event) just click the check mark next to the evet. See the "Completing an event" guide for examples.
