Completing an event
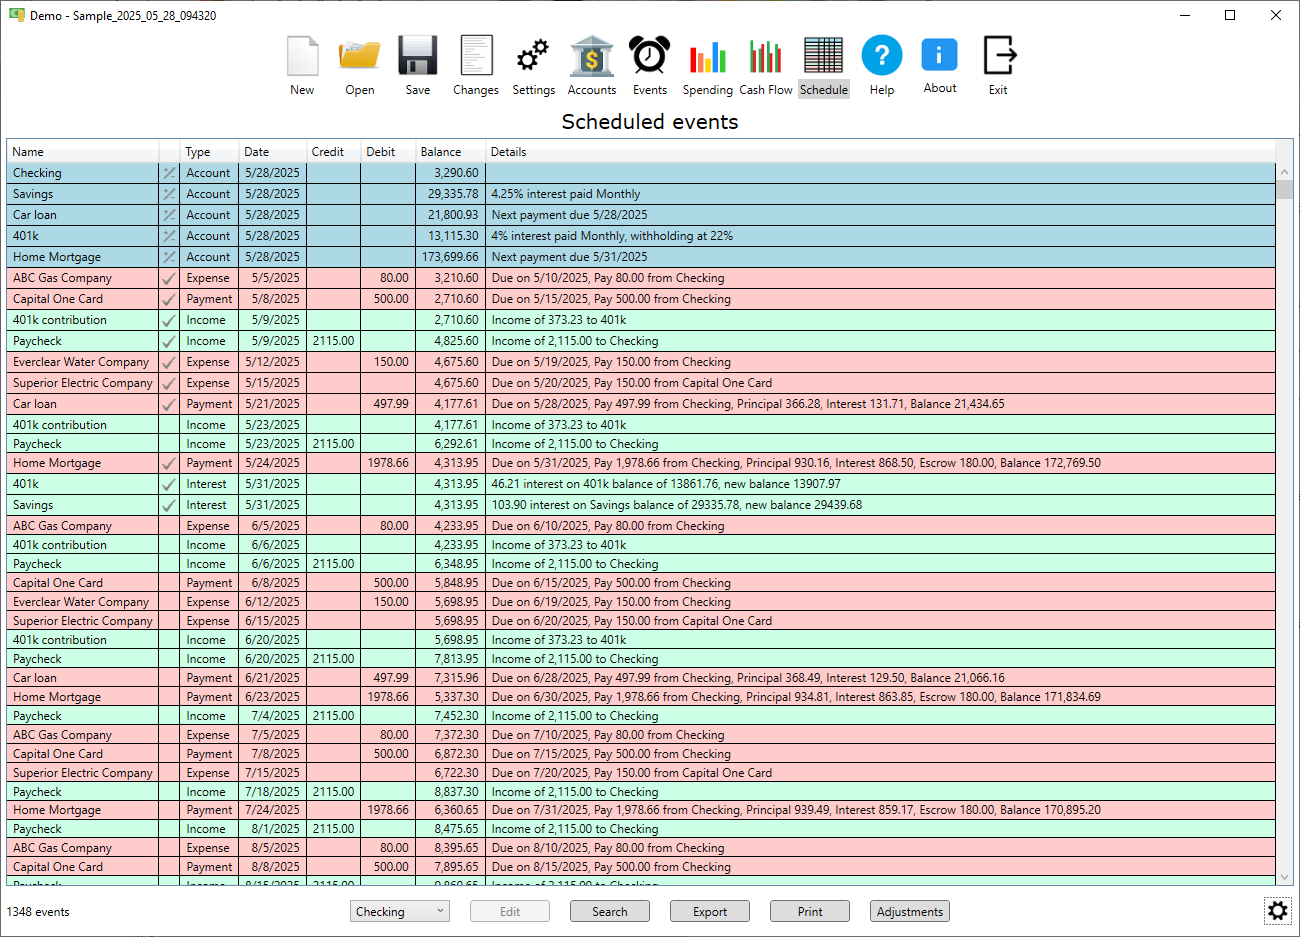
Event instances are completed on the schedule page. Go to the schedule page by clicking on the "Schedule" icon in the main menu at the top. On the schedule page is a list accounts with the current balance followed by a cronological list of every upcoming event instance, like upcoming bills, paychecks, reminders or other events that you have created. It's like a "To Do" list. It is where you can see upcoming event instances like what bills are coming due and when you need to pay them or when you get your next paycheck. Events that are marked hidden on the schedule page are still shown if they are occurring within the preview days specified. These event instances will remain in the list until they are completed. To complete an event just click the check mark in the second column. Note that only the next occuring instance of the event will have a check mark. If there is another instance shown it will not have a check mark. This is to prevent accidentally completing the wrong event instance.
You might notice that for accounts listed at the top of the schedule page there is a +/- instead of a check mark. Click this to add a transaction to the associated account. These accounts are also in a drop down list at the bottom of the schedule page. The balance of the selected account is what is displayed in the "Balance" column allowing the selected account balance to be seen at any time in the future.

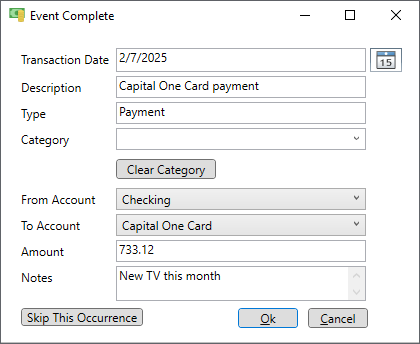
Let's pay a bill. Click on the first bill in the list to bring up the "Event Complete" window. Edit the "Amount" field to reflect the actual amount of the bill. The date of the bill will default to the date shown in the schedule but you can change it to the date you actually paid the bill. If there was no amount due for some reason then you can click the "Skip This Occurrence" button and that event instance will be skipped. Once an event instance is completed the schedule is updated and that occurrence is gone from the schedule. If a bill was paid then a transaction is created in the "From Account" with the appropriate information.
