Importing transactions
Transactions can be created through completion of events, manually creating them or by importing CSV files as explained here. CSV means "comma seperated values" referring to the fact that they are text files with a specific number of data columns per line usually seperated by commas. These can be downloaded from your bank or credit card company web site. They can be directly viewed with Notepad or any text editor or with Excel (or any spreadsheet application). Looking at them with a spreadsheet application is optimal because the data columns are pulled into individual columns, but it isn't too difficult to figure out in a text editor.
To get these from your bank or credit card log into your account using your browser then view the transactions. There will be a clickable "download" image somewhere. It will look something like one of these below.

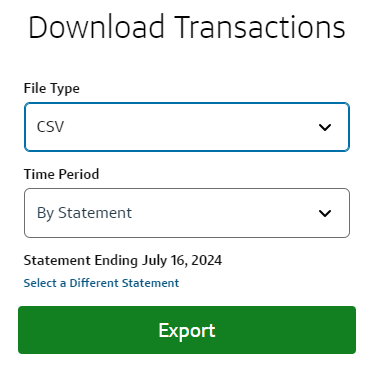
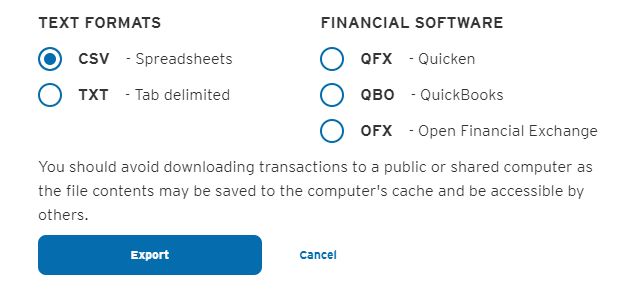
Click on the appropriate image and a download window will be displayed. It will allow you to specify the download format and possibly which transactions to download. Select the CSV format. If CSV is not there look for "Microsoft Excel" or just "Excel". Some examples are below.


After importing the CSV file it will likely be located in your Windows "Downloads" directory. You can import it directly from there or you can move the CSV file to another directory specifically for CSV files from that account. Keeping the CSV files in different directories for different accounts will make it easy to avoid importing a CSV file into the wrong account. Keeping the CSV files is optional but it does help you remember what you imported last for that account.
It's a good idea to import transactions after your monthly statement comes out so you can import a whole month of data in one shot. The directory where the CSV file was imported from is stored with the account settings and used the next time you import to that account.
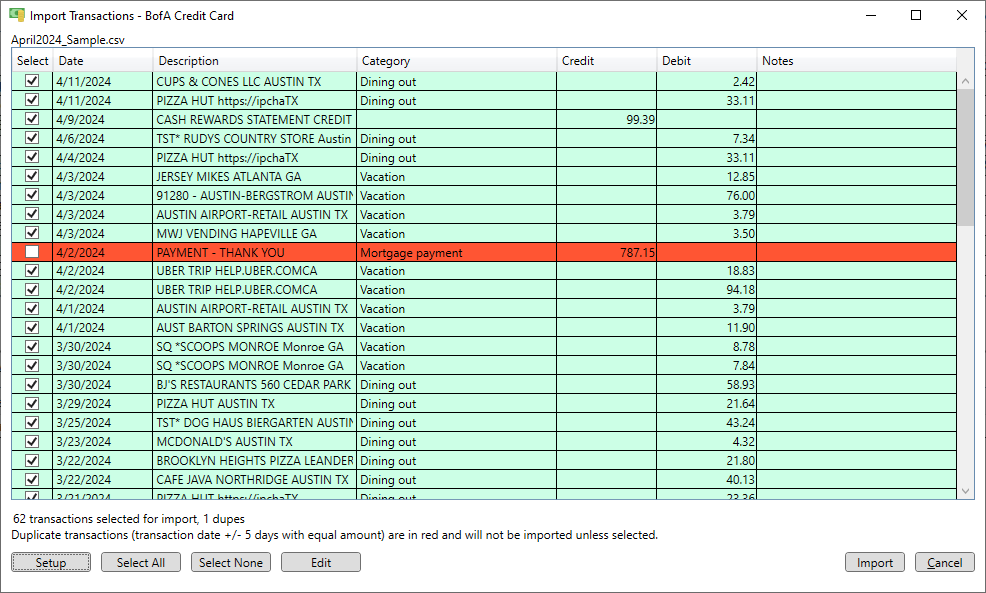
Once you have the CSV file downloaded to your computer go to the accounts page and select the account in the upper list then press the "Import" button. The standard windows open dialog appears. Select the CSV file and press the Open button. Now you will see the "Import Transactions" window with the CSV data converted to transactions. There is also a checkbox on the left of each transaction. Only the checked transactions will be imported. Duplicate transactions (transaction date +/- 5 days with equal amount) are in red and are not checked since they should not be imported. You can also edit any of the transactions to correct the category, add a note or make changes to anything else. Multiple transactions can be selected at once to make all the transactions have the same date, transaction type, description, category or note. It's best to check the categories before importing. If everything looks ok you can just click the "Import" button. After the import is complete a message box will appear letting you know how many transactions were imported.
In the example below there is one duplicate because the payment transaction was already recorded in the BofA Credit Card account when the BofA Credit Card payment event was completed earlier on the schedule page.

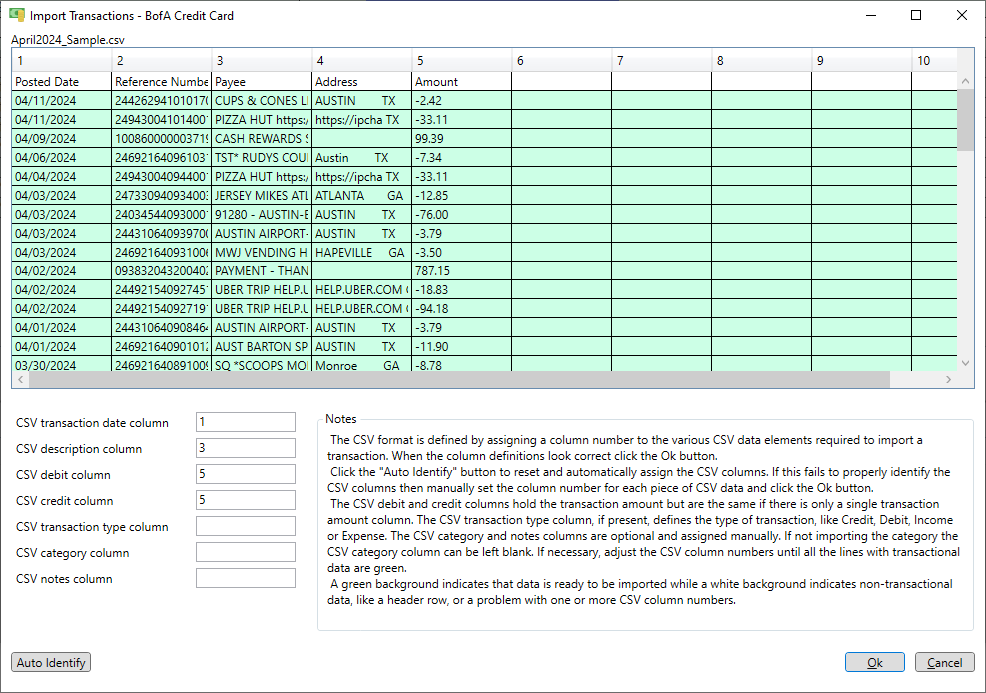
If the data is missing or doesn't look right then click the "Setup" button to identify the columns in the CSV data. The CSV file is shown with numbered columns above the data. Below the data are several CSV fields with numbers from those columns. This allows a particular data column to be placed in the correct field. Typically these are prefilled with the correct numbers, but if not this window allows the columns in the CSV data to be identified. To try to auto identify the column numbers click the "Auto Identify" button.
